📖 Operation Instructions
Image Compression and Cropping
Hold the circular slider to adjust compression quality and compression size. Select the output image format from the output format dropdown menu. After parameter selection, click the start compression button to complete image compression.
Below the compressed image on the right, click the rotation and flip buttons to adjust the image orientation. Click the reset button to restore the image to its initial state.
Click the crop button below the original image to enter crop mode. Hold the rotation icon at the bottom right corner of the crop box to rotate the crop box at any angle; click the pen icon in the center of the crop box to manually input the width and height of the crop box; move the mouse inside the crop box, the cursor changes to four-way arrows, hold the mouse to pan the crop box; hold the squares around the crop box to adjust the crop size. Click the apply button to make the crop effective.
Add Watermark
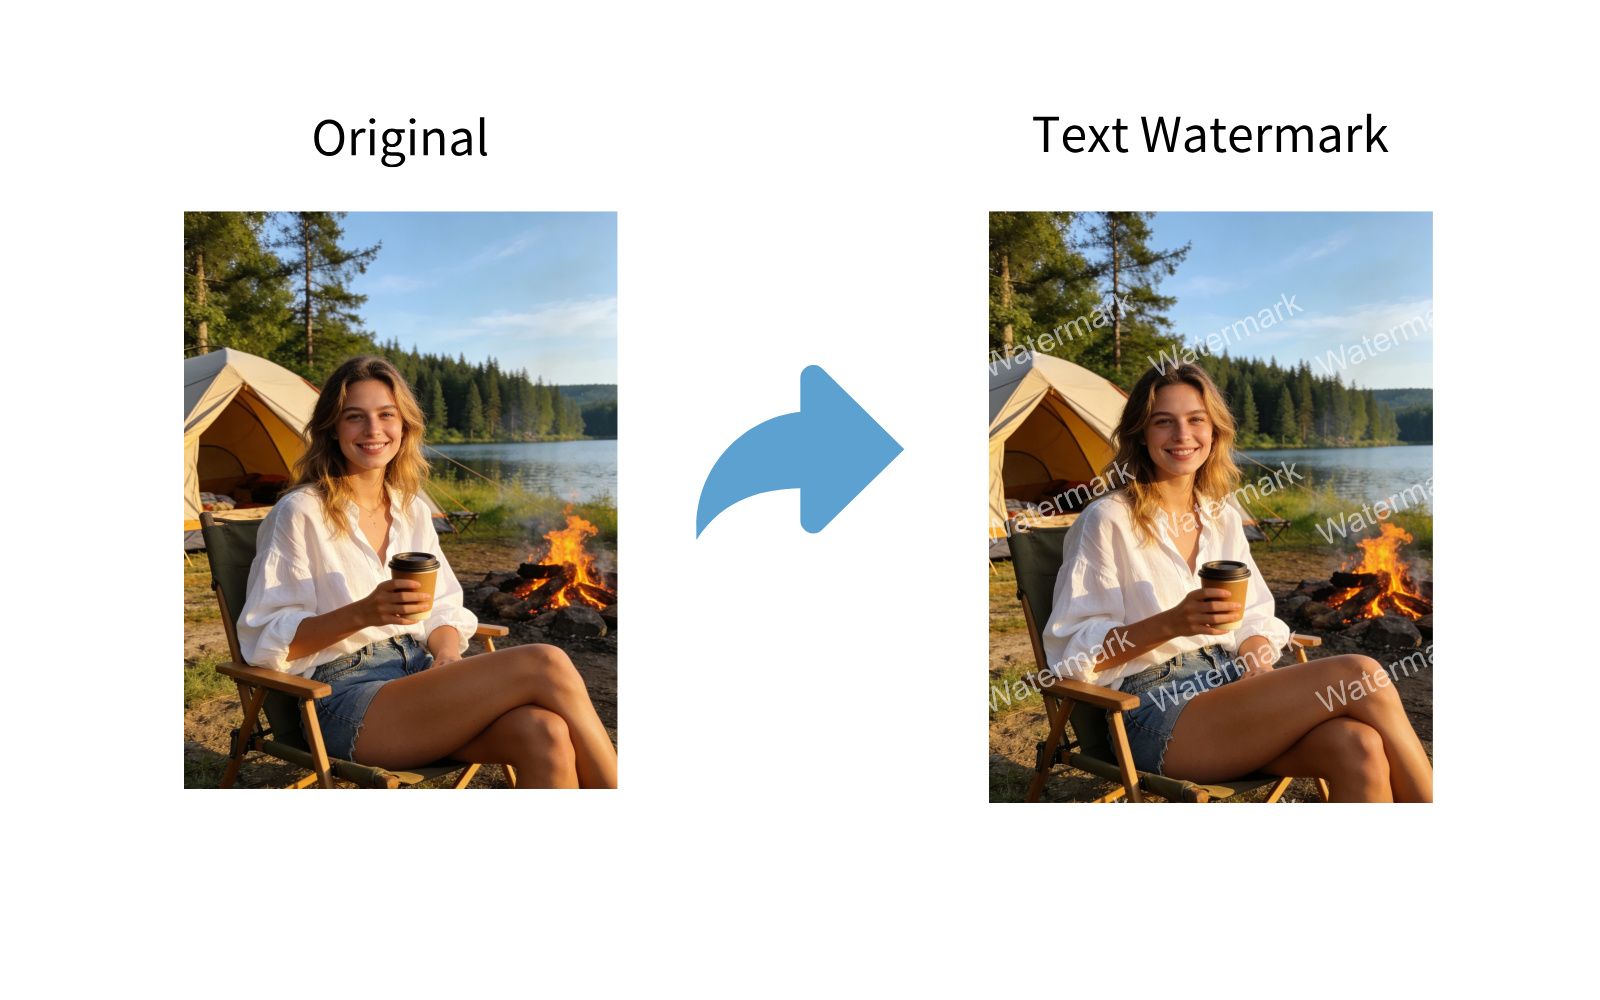
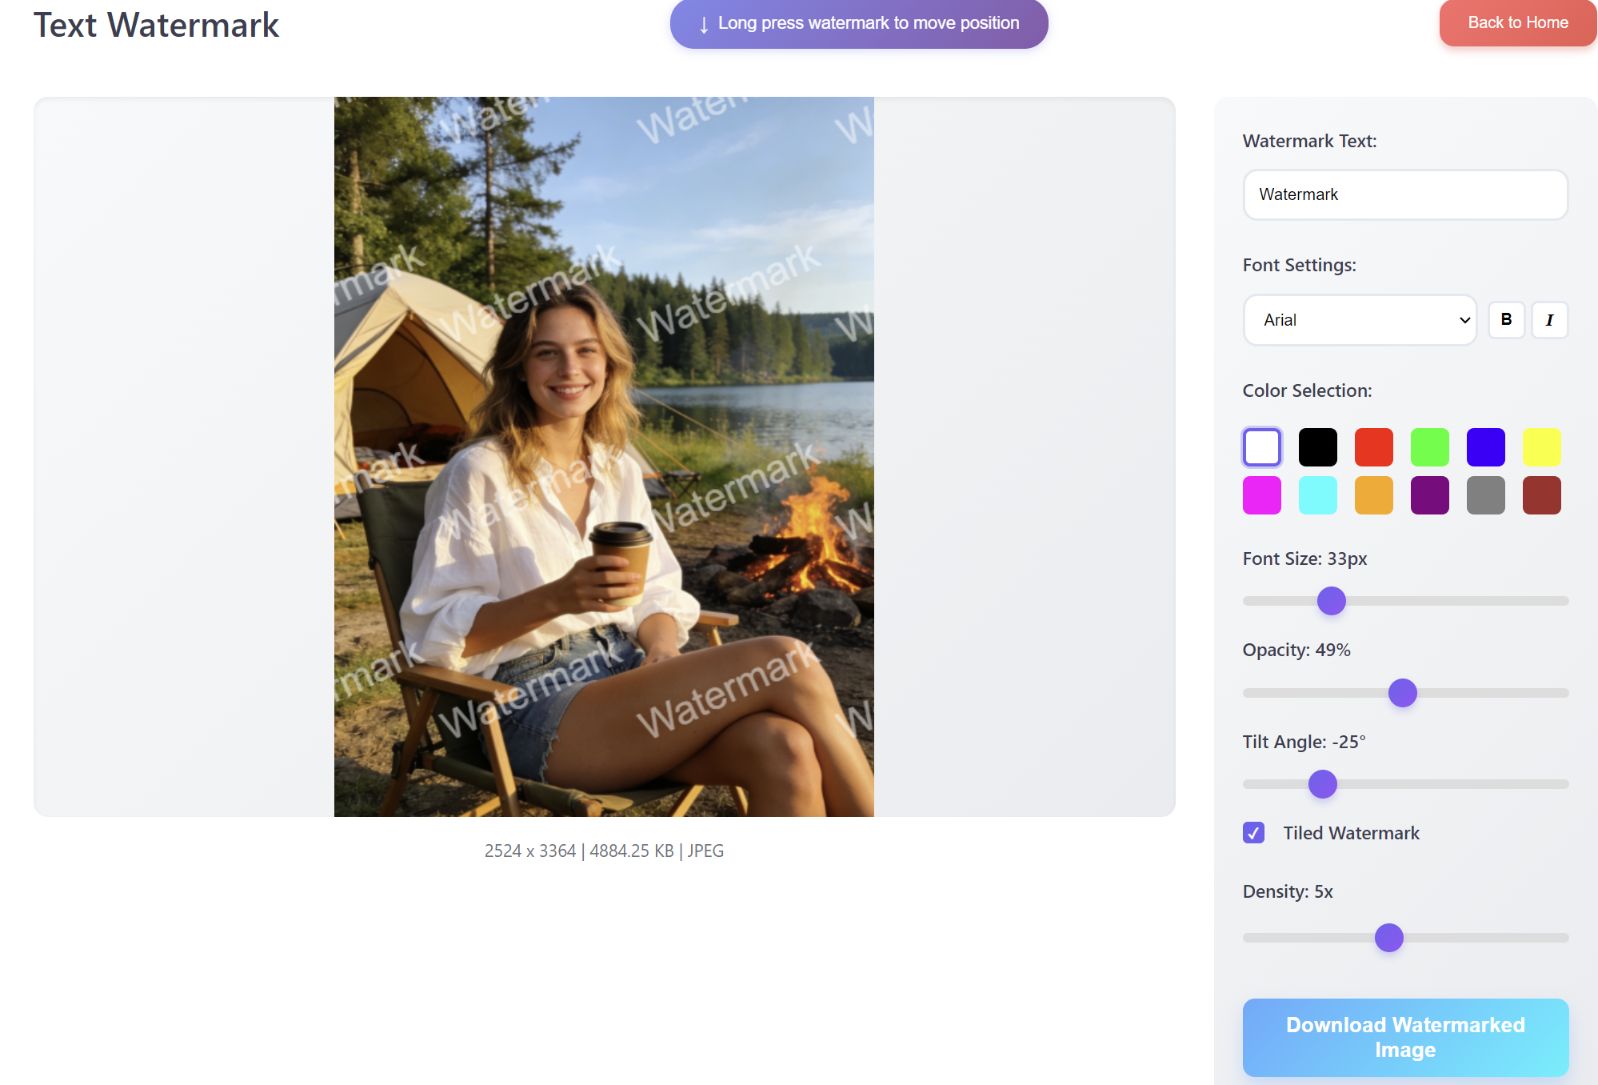
Enter your watermark text in the watermark text input box, select font and color, hold the circular slider to adjust font size, transparency, and watermark tilt angle. Check tiled watermark to achieve the effect of multiple tiled watermarks. You can use the slider to adjust the watermark tiling density.
Image watermark allows you to select any image as a watermark. Hold the circular slider to adjust the watermark image size, transparency, and tilt angle. You can also check tiled watermark to achieve the effect of multiple tiled image watermarks. You can use the slider to adjust the image watermark tiling density.
ID Photo
Upload a clear front-facing portrait photo, otherwise detection will fail.
The crop box is automatically generated at the optimal size and position based on intelligent face recognition. You can also manually adjust the crop size and pan the crop box position. On the right, you can select various background colors and rich specifications. You can download a single photo or an 8-photo layout, convenient for printing multiple photos at once.
Image Split and Merge
Selecting 1 image defaults to image split mode, selecting multiple images defaults to image merge mode. You can select up to 16 images for merging.
In image merge, besides selecting preset ratios for canvas size, you can also manually input canvas size, maximum 8000x8000px.
In image merge, clicking an image selects it. The selected image will have a blue border around it. After selecting an image, you can use the mouse wheel to zoom in/out, maximum 500% of the original image. Hold the mouse on the image to pan it. Moving the image to an adjacent image position will automatically swap image positions.
After selecting an image, click the flip button at the bottom of the right sidebar to flip the image. Click the reset button to restore to the initial state.
After selecting an image, drag the rotation slider at the bottom of the right sidebar to rotate the image.
Place the mouse at the seam between images and hold the mouse to drag and adjust the seam position.
Canvas background defaults to white. You can select any color as the canvas background, or upload an image as the canvas background. Border size, spacing, and corner radius can all be adjusted with sliders.
Document to Image
Supports PDF document upload. You can choose page-by-page conversion (each page converts to one image) or convert to long image (multiple pages are stitched into one long image). If your document is PPT/Word, please first export it as a PDF document with Office before uploading.
Selecting ultra-high or high quality for image quality, although displaying good quality, will result in larger image size and file size. If you need smaller image size and file size, please select normal or compact mode for better results.
Conversion range can input any page number range. You can flexibly select any continuous segment of page numbers, which helps precise conversion and reduces image size and file size.
When converting to long image, if image length exceeds 16383 pixels, WEBP format cannot be selected. If image length exceeds 65535 pixels, JPG/JPEG format cannot be selected. PNG format has no image length restrictions.
Image to Document
Supports uploading up to 200 images to convert into one document or multiple documents. Supports saving as PDF document.
Hold and drag photos to adjust image page order. After selecting output method and page size, click the convert button below to convert to the corresponding document and download.
⚙️ Feature Limitations
Image Compression and Cropping
Quantity Limit: Upload 60 images simultaneously in batch (not recommended to upload large batches of images larger than 10M, may cause browser freeze)
Image Size: Maximum 200MB per image
Input Format: JPG, JPEG, PNG, WEBP, GIF, AVIF, BMP, TIFF, ICO, HEIC, PSD
Output Format: JPG, JPEG, PNG, WEBP (default JPG, if input image single side pixels exceed 65535, output format defaults to PNG)
Crop Limit: Crop function not supported if image single side pixels exceed 30000
Output Name: original_filename_compressed_timestamp (single image); original_filename_compressed_timestamp_and_sequence (multiple images)
Progress Indicator: When total image size exceeds 10MB, progress indicator shown during upload and compression, no progress indicator when less than 10MB (usually completes within 1 second)
Add Watermark
Quantity Limit: Upload 60 images simultaneously in batch (not recommended to upload large batches of images larger than 10M, may cause browser freeze)
Image Size: Maximum 200MB per image
Input Format: JPG, JPEG, PNG, WEBP, GIF, AVIF, BMP, TIFF, ICO, SVG, HEIC/HEIF, PSD
Output Format: If input format is JPG, JPEG, PNG, WEBP, output format matches input format; if input is other formats, output format automatically converts to PNG
Output Name: original_filename_watermarked_timestamp (single image); original_filename_watermarked_sequence (multiple images)
Watermark Type: Text watermark, Image watermark
Watermark Count: Single watermark, Tiled batch watermark
ID Photo
Quantity Limit: Upload 1 photo per session
Image Size: Maximum 200MB
Input Format: JPG, JPEG, PNG, WEBP, GIF, AVIF, BMP, TIFF, ICO, SVG, HEIC/HEIF, PSD
Output Format: PNG, JPG, JPEG, WEBP
Photo Requirements: Front-facing portrait photo with clear visible face
Image Split and Merge
Quantity Limit: Split mode 1 image, Merge mode up to 16 images
Image Size: Maximum 200MB per image
Input Format: JPG, JPEG, PNG, WEBP, GIF, AVIF, BMP, TIFF, ICO, SVG, HEIC/HEIF, PSD
Output Format: JPG, JPEG, PNG, WEBP
Output Size: Maximum 8000x8000px, Minimum 100x100px
Progress Indicator: Progress indicator shown when total uploaded images exceed 30MB, no progress indicator when less than 30MB (usually completes within 1 second)
Split Mode: Upload 1 image defaults to split mode, supports custom row/column count, maximum 10x10 split
Merge Mode: Upload 2-16 images defaults to merge mode, each layout has multiple template layouts to choose from
Document to Image
Quantity Limit: Upload 1 document per session
File Size: Maximum 500MB, up to 3000 pages
Input Format: PDF
Output Format: JPG, JPEG, PNG, WEBP
Output Size: JPG/JPEG file maximum height/width limit is 65535 pixels. When converting to long image, if image height exceeds this value, you can choose to reduce conversion range pages, or use PNG format output, or select normal/compact to reduce image size. WEBP format not recommended for long images, as WEBP maximum pixel limit is 16383 pixels
Progress Indicator: Progress indicator shown for both document upload and conversion process
Conversion Range: Flexibly select any continuous segment of page numbers
Image to Document
Quantity Limit: Upload 200 images simultaneously in batch (not recommended to upload large batches of images larger than 10M, may cause browser freeze)
File Size: Maximum 200MB per image
Input Format: JPG, JPEG, PNG, WEBP, GIF, AVIF, BMP, TIFF, ICO, SVG, HEIC/HEIF, PSD
Output Format: PDF
Progress Indicator: When total image size exceeds 10MB, progress indicator shown during upload and conversion, no progress indicator when less than 10MB (usually completes within 1 second)